6. Into the MiSTix
Right, let’s have a bit of a deep dive into the capabilities of the MiSTix board.
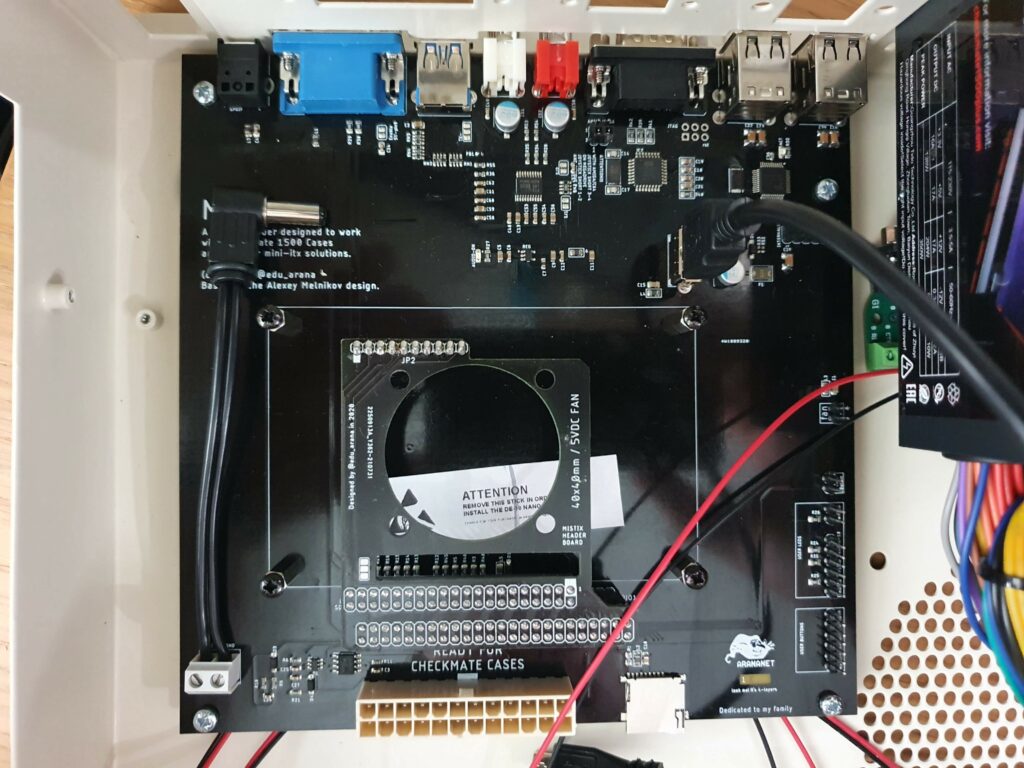
Here’s the top down view. We’ll start at the bottom and work up. In the bottom left hand corner we have a power connector which will go into the barrel jack of the DE-10 Nano. Moving right we see an ATX power connector, and then a Micro-SD card slot. I haven’t tested this, but I believe this is the second SD card which is required by one or two of the MiSTer cores, rather than a substitute for the slot on the board itself. On the right side of the board we see a row of pin headers. Let’s zoom in on those.
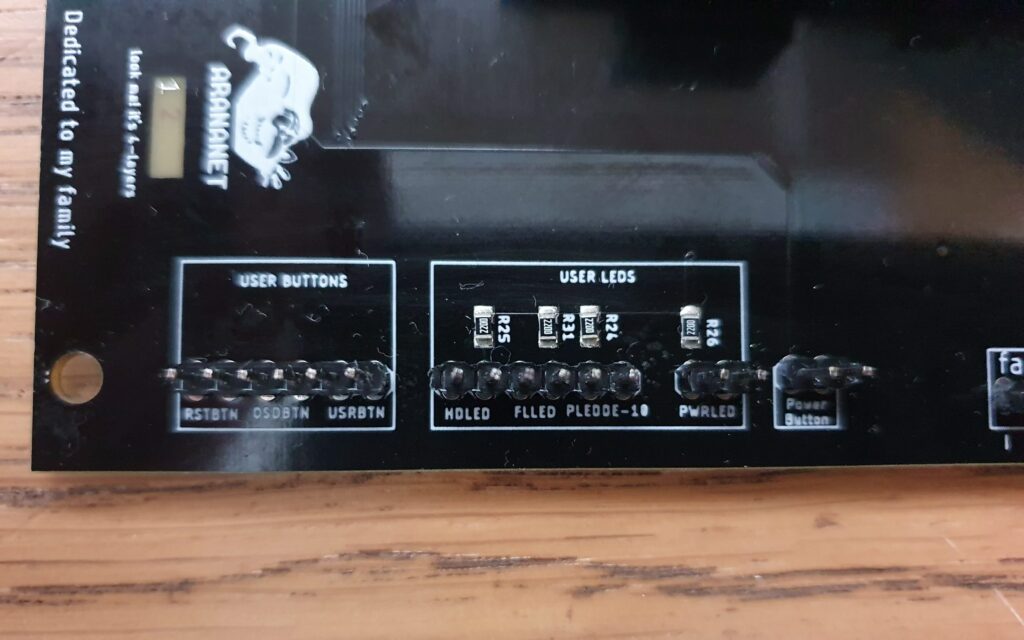
The first block contains 3 two pin headers for connecting buttons, these buttons being the Reset, On Screen Display and User buttons which are on the IO Boards. Next we have 4 two pin headers for LEDs. From left to right we have ‘HDLED’ which can only be Hard Drive LED. We next have ‘FLLED’. Floppy LED presumably. Now, this doesn’t exist on MiSTer boards, but what does exist is a ‘User’ LED which is assigned different functions depending on the core. On the Amiga core, the User LED is used for floppy drive activity, and testing confirmed that ‘FLLED’ is indeed the User LED. Next we have a minor puzzle ‘PLEDDE-10’ and ‘PWRLED’. PWRLED is obviously power, and my best guess is that the other one is also a power LED that is used to show that the DE-10 board has power. I ignored this one and used PWRLED for power, and so far it has acted as I would expect. Moving on, we have a single two pin header for a power button, and just off the edge of my photo we have another two pin header for connecting a 5V fan.
In the middle of the board are four standoffs for mounting the DE-10, and on top of this sits the small fan mount which connects pins on the top of either side of the DE-10 to a double row of pins on the board. Let’s now look at the ports which are mounted along the top of the board, and can be accessed from the rear of the case.
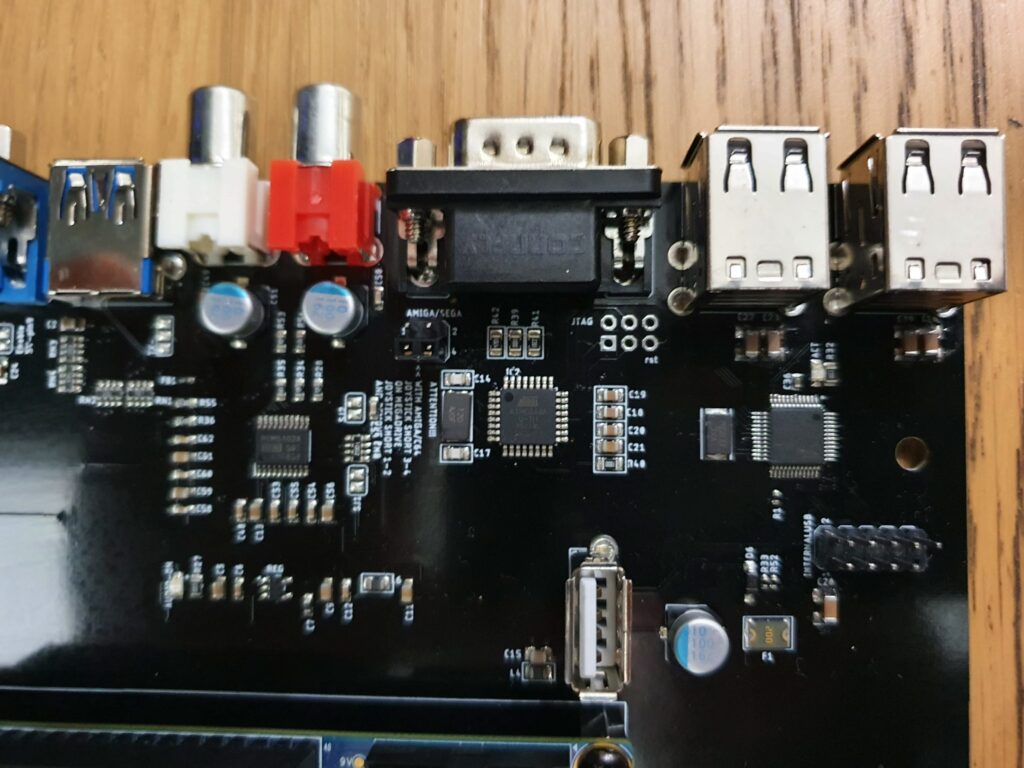
On the right side we have two double USB ports. Next to this is a DB9 socket for connecting original Amiga joysticks. A nice little touch is a jumper below this port which enables you to change it to take Sega joysticks, which also used a DB9 but with a different pin configuration. Next we have dedicated analogue audio outs: right and left. Next to this we have what looks like another USB socket, in the blue of USB3. This is not a USB port, it is the ‘User IO’ port seen on MiSTer IO boards, which allows the connection of a number of different peripherals. It is USB format simply because this is a readily available connector – if you try and connect a USB device to this you are going to have a bad day.
Some other points of interest here: there is an additional USB port mounted on the board pointing vertically upwards. This is where you connect your USB OTG cable from your MiSTer: the MiSTix board then works as a USB hub to give you the USB and DB9 ports on the back. It also provides an internal USB header, which can be seen to the right of this port.
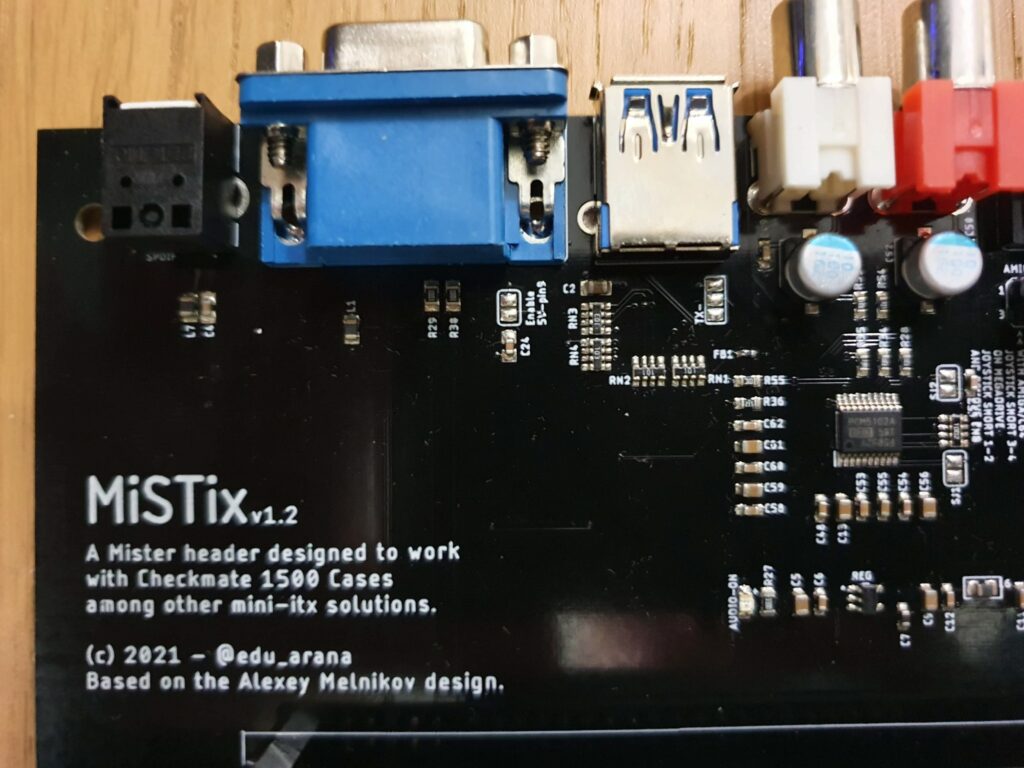
To the left of the user IO port we have a VGA connector, and to the left of that a surprise! An optical SPDIF out as an additional audio option. This was not in the original plan for the board, but was added at the last minute by the creator (who you can see from the text on the board here is the marvellous Edu Arana).
That’s it for the board, but those who are paying attention will realise that some ports are missing, specifically the HDMI and ethernet that are on board the DE-10. There’s a solution for this in the form of the ITX mounting frame that was available for purchase with the MiSTix board.
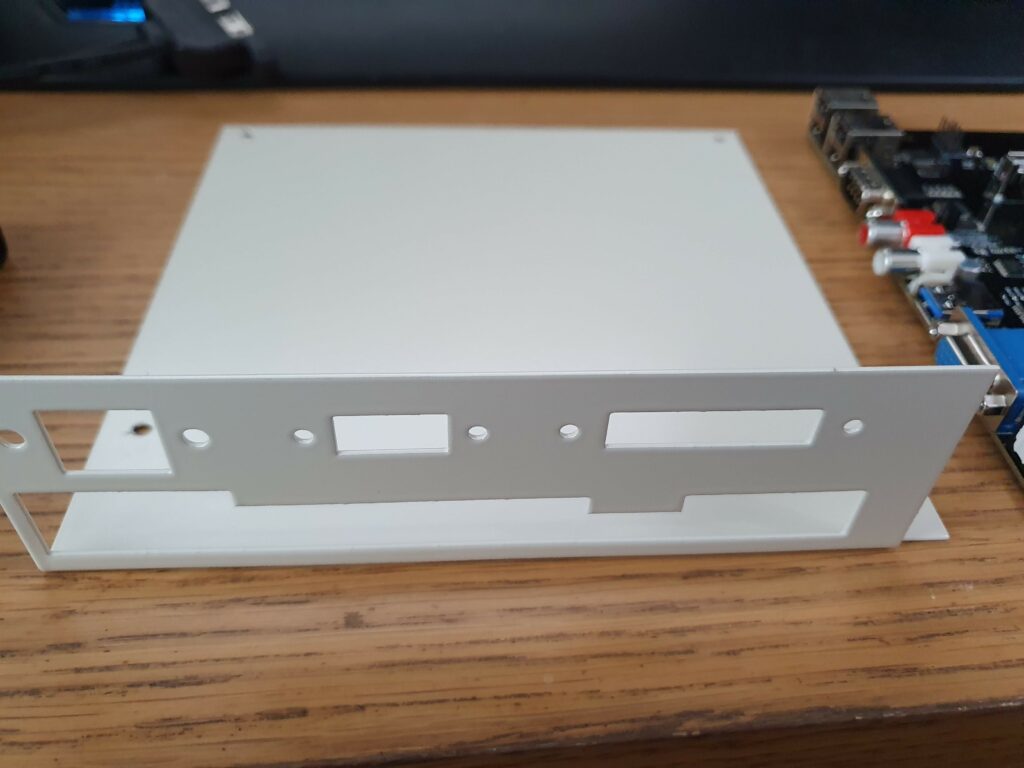
Here’s the frame. Along the bottom is where the ports on the MiSTix board stick out. Above this are holes which enable the ethernet and HDMI ports to be panel mounted using short extension cables. There is a third hole which can accommodate two more USB ports, which can connect to the internal header.
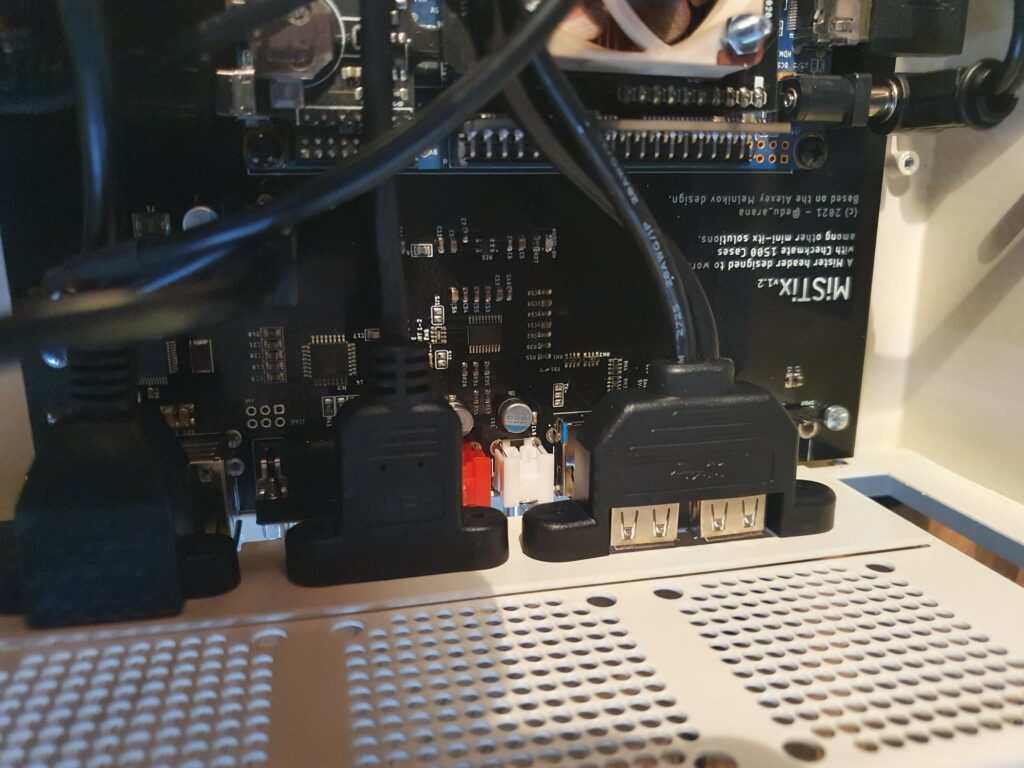
Here we are with the MiSTix board mounted in its frame inside the case. You can see the panel mounted ethernet, HDMI and USB which are connected to the board or the DE-10.
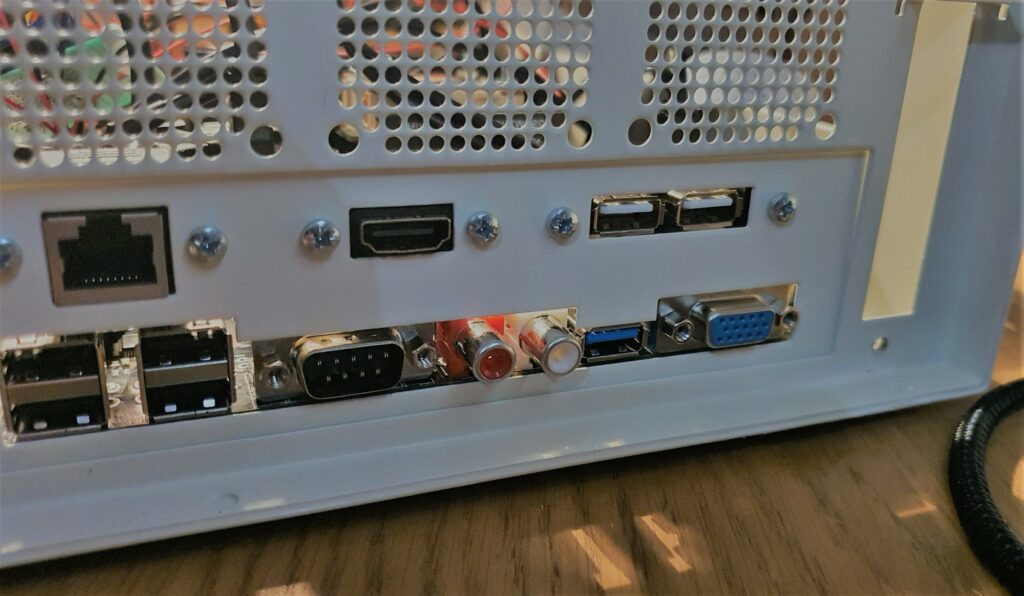
And here’s the same setup, but viewed from the outside. A nice tidy job. Overall, the board is an absolute triumph, and combined with the mounting kit it fits into the Checkmate case like a glove. Stephen Jones and Edu Arana know what they are about. The Amiga community is lucky to have people like that doing what they do.
There’s just one small fly in the ointment – one small oversight. Have you spotted it? I’ll address it in my next post!